Description
Biographical and contact information of a faculty or staff member. Extended bios link to a separate page with a unique URL.
Available in zones:
Permissions:
- Available to all content editors
How to use it
Navigate to the section where you wish to add this content item. Click "Create content" then select the "Faculty and Staff Bio" content type.
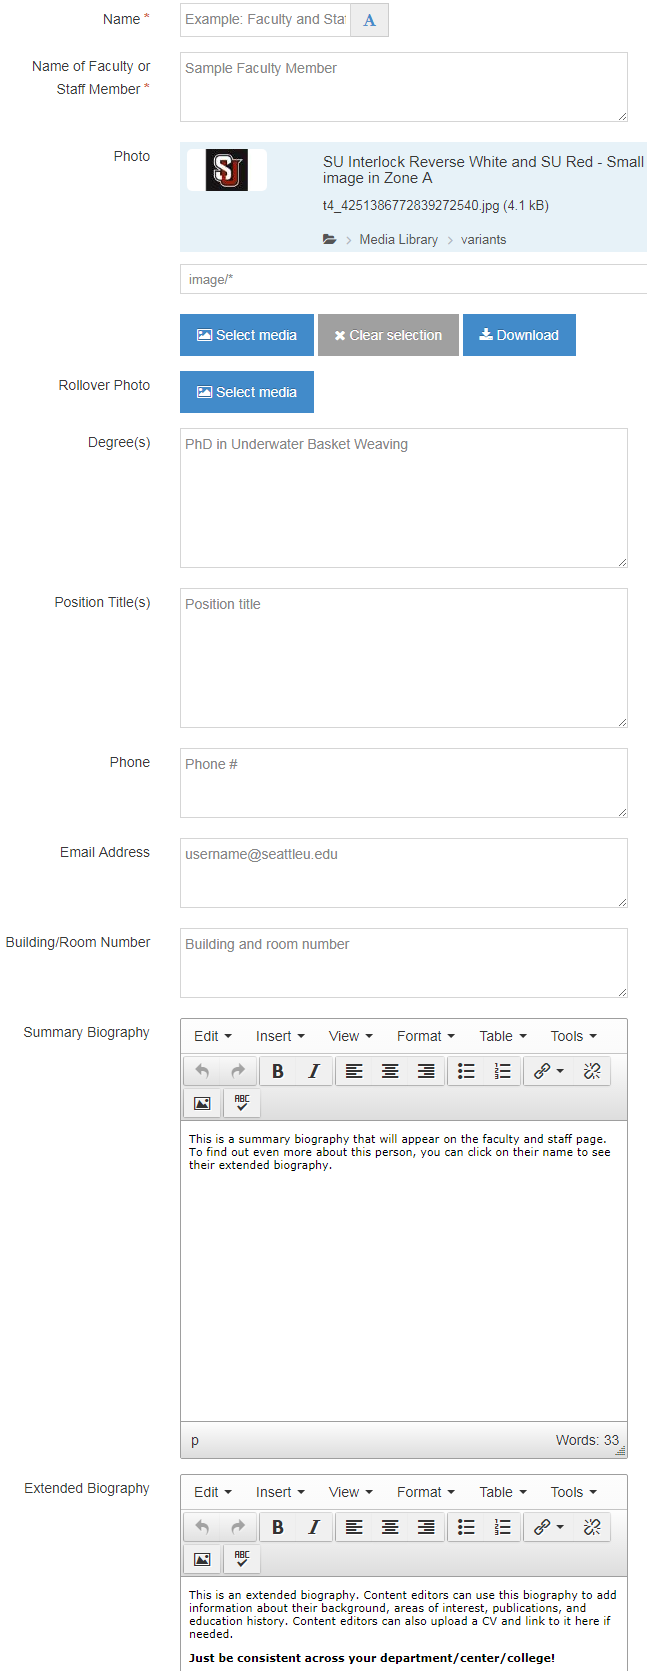
Required fields
- Name
- The text in this field is for internal, informational purposes only, and appears in the list of 'content in this section.'
- Name of Faculty or Staff member
- The text in this field should be the individual's name. The text in this field also becomes the page heading and part of the URL of the separate page where the full text of the extended bio is displayed.
Optional fields
- Photo
- This field will be an image from the Media Library and will be the default display photo.
- Pro-tip: When you have several faculty and staff bios on one page, it looks the best when all of the bio photos are the same size.
- Rollover photo
- This field will be an image from the Media Library, and it will display when users roll their mouse over the photo (though mobile users have to tap the default photo to view the rollover photo).
- Pro-tip: The default photo and the rollover photo should be the same size.
- Degree(s)
- Position title(s)
- What position(s) or title(s) does this person hold at Seattle U?
- Phone
- Email address
- If you put a valid email address in this field, the template will automatically create a "mailto" link so that users can click on the email address and it will open an email message.
- Building/room number
- This should be the person's physical location on campus: what building and room can we find this person?
- Summary biography
- This should be a short bio (less than 2000 characters), could include a link to the person's CV.
- Extended biography
Additional things to consider
Consistent formatting
If you have a section with multiple faculty and staff bios on it, the page looks more aesthetically pleasing and professional when all of the bios consistently include the same fields and the same size and formatting.
Mirroring bios
Often, individuals will have their faculty/staff bio listed on multiple webpages; for example, a faculty member in the department of chemistry will typically have a bio listed on the Chemistry department web page, and the whole College of Science and Engineering faculty directory web page.
Instead of having two separate content items in two different sections, which if the bio needs to be updated will then need to be updated in two different places, you can mirror one bio content item into multiple locations. Then if the bio needs to be updated, the content item can be updated once and all of the mirrored versions will be updated as well. This can save time and effort for the person updating the websites, and will ensure that bios in different places display accurate information consistently.
Ordering content items in a section
When you have multiple bio content items in a section (page), you will probably want them to be ordered in a specific way - most commonly by alphabetical order of first or last name. When it comes to controlling the order of content items on a page, you essentially have two options for how you want to order all of your content items in your section (page).
- Manual ordering
- You can order how your bio content items appear on the page by clicking and dragging them into the position you want them to be in on the page.
- Automatic ordering
- Especially when you have a very large number of content items in a section, (for example, the College of Arts and Sciences has a few hundred faculty and staff bios in their college directory. Imagine having to order a few hundred bio items by hand -- yikes!) you may opt to have TerminalFour automatically order your content items for you: alphabetical order (by name of the content item), chronological order by last modified date or publish date.
- Near the top right hand side of the page, above the green 'Add content' button, you will find the "Enable automatic ordering" button. If the button is grey with an X, then automatic ordering is turned off. You can click the button to enable automatic ordering, the button will turn orange and have a check mark in it. Then you can select any of the ordering options, but it defaults to 'Alphabetical (A-Z).'
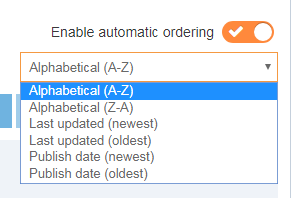
Pro-tip: If you want to order your bio content items alphabetically by last name, then you need to name your content items "Last name, First name" in the Name field. If you name the content item "First name Last name" and select the alphabetical automatic ordering option, then it will order the content items by the individuals' first names.
Examples