
On pages using either the "Standard Subpage" or "Standard Subpage without Page Title" page layout, you can customize the section banner in the Section Customizations folder.

Content editors can change these elements of the section banners:
Available in zones:
Navigate to the "Section Customizations" folder (should be a subfolder of the top level folder in your site structure).
If you do not currently have a Section Customizations folder and you wish to add a custom section banner, follow these instructions for creating a new Section Customizations folder.
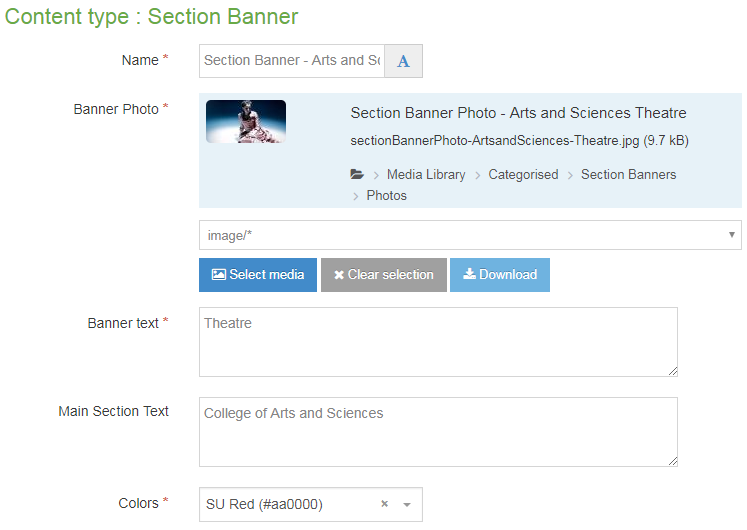
First, click over to the 'Content' tab and check to see if a Section Banner content item already exists within the Section Customizations folder. If one does not exist, then click "Create content," and then select "Section banner."
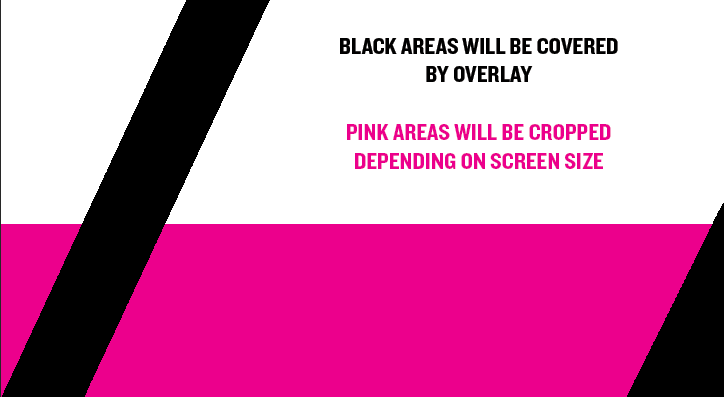
With the December 2017 design refresh, all banners are now going full-width, so in many cases, banner images will need to be upgraded to larger, more high resolution images. Given this upgrade, optimizing your images for the web is more important than ever.
Additionally, the new section banner has an unusual design shape for the banner image, which will need to be taken into account when selecting your banner image.
Select a rectangular banner image (at least 600px by 300px) but understand that portions of the image will be covered by the overlays, as you will see in the example below.
If you have Adobe Photoshop and wish to obtain a Section Banner template (.psd) in order to assist you in better selecting a banner image, please contact Megan Otis and request a copy.
Anytime you insert an image into your Seattle U website, first ask yourself: did you create this image? Are these images copyright protected? Do you have permission to use these images?
All web content must comply with the Seattle University Copyright Guidelines. Text, images and videos, and other media files, that do not meet these requirements must be deleted immediately.
In cases where copyrighted material is posted with the permission of the content owner, that permission must be attained in writing and be available for verification if needed.
You need to be sure your content is as accessible to all users as possible.
If your image files are providing important content to your users, then you need to include a description of the image that will convey the meaning of the image to users who cannot see or see well and are using a screen reader to navigate your website. You should include any text that appears on the image in the description.
When you upload your images into the Media Library, the text you add in the "Description" field will be read to users by the screen reader. Make sure the description is short but conveys the meaning of the image.